If you like brewing a wide variety of beer styles, you’ll need to use a wide variety of yeasts. At $3 to $10 per pack, yeast can be expensive! What if you could reuse your yeast while maintaining very healthy fermentations, saving money and making amazing beer?
Washing yeast is the process of rinsing a homebrewed beer’s yeast slurry with sterile water to remove trub, hop matter, and dead yeast cells. It’s an easy process that only requires a few basic pieces of equipment you probably already have. A gallon sized jug, a big funnel, and some pint-sized jars are all you need. The process is easy but keeping everything sanitized is vital to make sure your washed yeast is free from contaminants. A no-rinse sanitizer like Star San will get your equipment sanitized so your yeast can be safely stored for use in future batches of homebrew.
Technically, this procedure should be called yeast rinsing, since we aren’t actually using an acid to “wash” the yeast. At the homebrew level, the terms rinsing and washing are used interchangeably. Here’s our favorite, easiest, and most consistent method to wash yeast.
The Easy Way To Wash Yeast
Equipment needed
- No rinse sanitizer (Star San)
- 1 gallon of sterile water (Distilled water or tap water that’s been boiled and cooled)
- Glass jug (1 gallon jug or 4L Erlenmeyer flask)
- Large funnel
- 4 to 6 pint-size mason jars and lids
Step 1: Rack beer off the yeast cake
Before you can harvest and wash yeast, you need to get your homebrewed beer into a keg, bottles, or a secondary fermenter.
Carefully rack all of the beer out of the fermenter, leaving the layer of yeast and trub behind.
Re-seal the fermenter until you have time to wash the yeast. A yeast cake can safely be stored in a sealed fermenter for a day or two.
Step 2: Gather and sanitize washing equipment
When you’re ready to start the yeast washing process, gather all of the required equipment. Prepare the sanitizer solution and make sure everything is clean.
Sanitize the jug, funnel, jars, and lids.
Step 3: Add 1 gallon of sterile water directly to the fermenter
Pour 1 gallon of sterile water into the fermenter. Swirl the fermenter around to ensure the water and yeast cake evenly mix into a homogeneous slurry.
Step 4: Let yeast and water mixture settle for 45 to 60 minutes
Let the water and yeast mixture settle for about an hour. Slowly, the heavier trub material (including protein, hops, and dead yeast cells) will settle to the bottom of the fermenter.
The lighter colored, hazy liquid floating on top is where all of the yeast is.
If your fermenter is a carboy, a great trick is to lay the carboy on its side during this rest. The trub will settle along the side of the carboy and make it much easier to decant the yeast in the next step.
Step 5: Carefully pour the top layer into your clean and sanitized jug
After the trub has been given time to fall out of solution, the yeast and water layer needs to be decanted into a clean and sanitized jug.
Carefully pour the contents of the fermenter into the jug, through the sanitized funnel. As much as possible, leave the thick, brownish layer of trub in the fermenter.
Step 6: Let the mixture settle for 15 to 30 minutes
Allow the decanted mixture to settle for another 15 to 30 minutes. You’ll start seeing the trub layer separate and sink to the bottom. This step helps ensure that almost all of the trub is left behind and you’ll be saving only the cleanest yeast.
Step 7: Pour yeast layer into sanitized jars
After the mixture has undergone its final rest, you should see a clear separation of the yeast/water mixture and the bottom layer of trub.
Carefully pour the top layer into each of the sanitized mason jars. You may need to let the jug rest after you fill each jar to make it easy to decant the yeast without transferring trub.
Cover and seal the jars with sanitized lids. Don’t screw the lids on completely tight. They should be ever-so-slightly loose to allow for any remaining CO2 to escape. After a week in the fridge, you can fully tighten them, if desired.
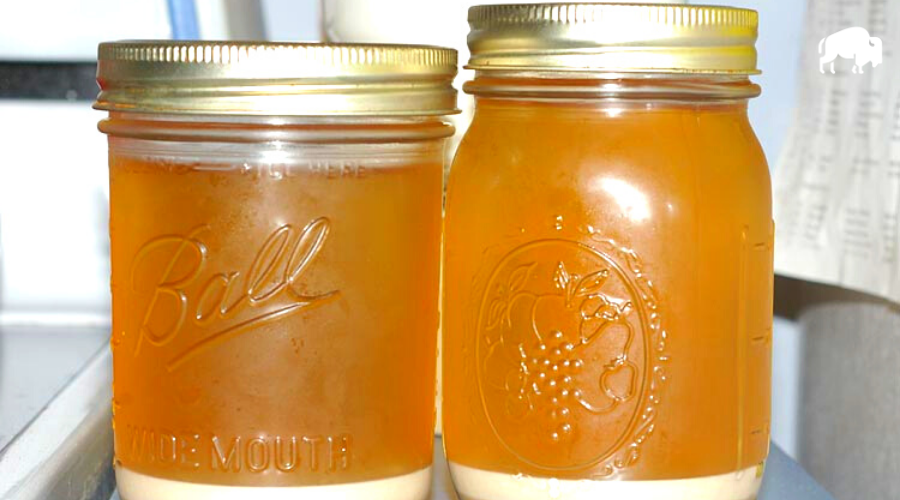
Step 8: Store washed yeast under the water mixture for up to 3 months
Label the jars and place them in the fridge for storage. The washed yeast will be viable for easily up to 3 months. Longer than that, and the yeast viability will decrease and its health will deteriorate.
You’ll start to see all of the healthy yeast settle to the bottom of the jars. The white, creamy top layer is clean and healthy yeast. At the very bottom, you will probably still see a bit of darker brown trub. This is inevitable when yeast washing, but nothing to worry about.
If you want to combine all of the yeast into one jar for storage, that’s also fine. Simply decant off most of the storing water from each jar. Pour all of the yeast deposits into one of the jars.
Step 9: When ready to use, pour off most of the clear liquid and make a starter
A day or two before you’re ready to brew, make a yeast starter with the washed yeast. Pour off most of the clear liquid above the layer of yeast and give the jar a swirl to get the yeast cake in suspension. Add it to your starter wort with a bit of yeast nutrient.
What are the benefits of yeast washing?
You may be wondering if washing yeast is worth the time and effort. Can’t you just harvest and store a yeast slurry directly from the fermenter? Sure you can, but depending on the yeast, you may want to wash it.
Washing yeast offers a few added benefits compared to simply harvesting a slurry.
Removes hop matter, dead yeast cells, and protein from saved yeast
The biggest benefit of yeast washing is to clean yeast from the trub. Hops, dead yeast cells, and protein from grain are all mixed in with a yeast slurry. Using the yeast washing technique, you can be sure to remove most of this debris and store only the purest and healthiest yeast.
When brewing dry hopped beers or protein-heavy styles like wheat beer, yeast washing is especially useful. It will get rid of that large amount of excess and unwanted trub.
Removes strong flavors from yeast slurry
If you’re worried about flavor carry over from one batch to the next, washing your yeast will eliminate that chance. Say you’ve just brewed a dark and smoky Rauchbier, but you loved the fermentation profile so much you want to try the yeast with a Pilsner. Not to worry. Simply wash the yeast and repitch into your Pilsner wort.
Washing can get rid of most of the flavor from harvested yeast. You can rest easy knowing that your next batch’s flavor profile won’t be impacted by your previous brew.
Saves money
Reusing perfectly healthy yeast is a no-brainer. Why throw away yeast that you just used to brew an amazing beer? Yeast harvested from a fermenter has a very high cell count and is, in general, very healthy. Harvesting that yeast and washing it lets you use it multiple times. Even if your yeast slurry looks messy – filled with hops and other stuff – yeast washing can bring it back to looking squeaky clean.
For those brewers who love experimenting with yeasts, you know it can get expensive buying a fresh pack every time. Wash all those rare and expensive speciality Belgian, German, or Lithuianian strains to get more bang for your buck.
Final Thoughts
Washing yeast is a simple procedure that can save you money, make better beer, and give you lots of flexibility when designing your next recipe. Having a few jars of various healthy yeasts in the fridge lets you get creative and brew outstanding beers across many styles.
As long as you practice careful sanitation procedures, you’ll find success in washing yeast. Making sure to use sterile water for washing the yeast and carefully sanitize all of your equipment.
Adding yeast washing to your skill-set gives you the confidence to reuse yeast, helping you make the best possible beer, batch after batch.
Frequently Asked Questions
Can you wash dry yeast?
Yes, dry yeast can be washed in the same way as liquid yeast. It was once thought that dry yeast was of sub-par quality compared to its liquid counterparts. But advancements in yeast technology have all but equaled the playing field.
With the fantastic range of dry yeasts on the market today, feel free to wash and reuse a slurry that you want to keep on hand for use in a future brew.
Should you reuse dry yeast?
Yes, definitely! Even though most dry yeast is inexpensive, it’s still a fine idea to wash and reuse it. Especially for some of the harder-to-come-by strains, washing is extra valuable.
If you live in a remote area, or have difficulty sourcing homebrew ingredients, washing dry yeast makes all the more sense.
How many times can you reuse the same yeast?
Some brewers reuse the same yeast for years. That being said, it’s generally thought that most yeasts can be used between 8 to 10 times before being discarded.
After multiple generations, yeasts can mutate, changing the flavors. Also, small amounts of contamination can start to cause noticeable effects on beer if the yeast is not stored perfectly.