Credited as an Aussie brewing practice, no-chill brewing has caused quite a stir in the homebrewing world these past few years. Today we’re looking at everything you need to know about no-chill brewing and whether or not it’s something you might want to give a try.
How to Brew Using the No-Chill Method
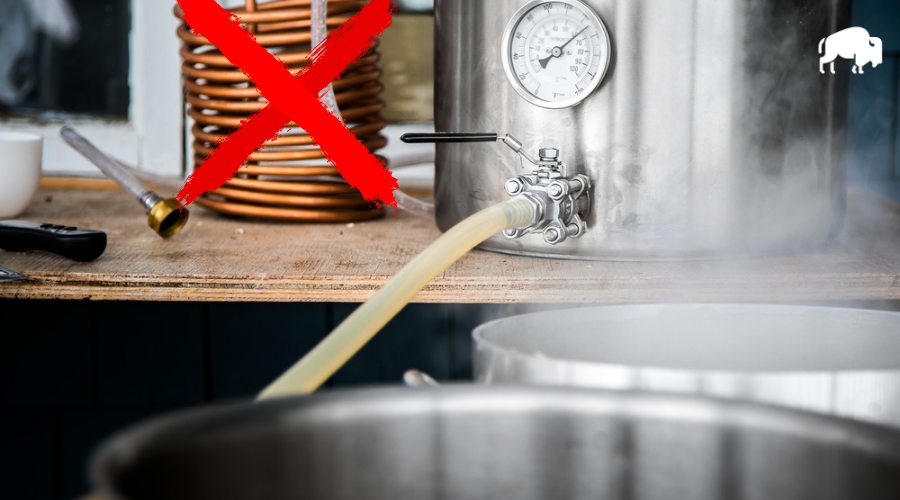
Brewing beer with the no-chill method requires a single change in brewing practice. Instead of chilling your wort post boil, you’ll simply transfer your hot wort into an appropriate container and let it cool slowly to pitching temp. Cooling typically occurs at ambient temperatures but can also take place in a refrigerator or keezer.
No-Chill may be Misleading
For a lot of people the first time they hear about no-chill brewing, it’s pretty confusing. Does it mean I’m not chilling my beer ever? Is that possible?
First, let’s talk about chilling vs. cooling. I remember John Palmer talking about this once. It’s a bit symantical but bear with me.
Chilling is active. Cooling is passive. Chilling implies that you’re using something to force a temperature drop i.e. an immersion chiller or other implement.
Now we can see, by definition, no-chill doesn’t mean you’re not cooling your beer. It does mean you’re not using a chiller of any kind or other methods (e.g. ice bath) to chill rapidly.
Steps for No-Chill
The first thing to consider when using the no-chill method is recipe design. More on that below.
Assuming you’ve got your recipe nailed down, let’s take a look at the actual process.
Once your boil is over, transfer the hot wort into a sanitized container. Try to avoid excessive splashing at this point and a precaution against hot-side oxidation. Seal the container and place it in the coolest place you can find.
Once the wort reaches your desired pitching temp, go ahead and transfer to your fermentor and pitch your yeast. That’s it. Simple.
Pros of No-Chill
No-chill brewing offers many advantages over conventional chilling methods.
Save Water…No-chill with a Friend
Saving water isn’t a joke. Especially in Australia where no-chill originated. If you recall, Australia was literally on fire in recent history. In fact, Australia has a crazy and awful history with bushfires.
As you can see, Australians have real reasons not to waste water. But there is also a strong homebrewing and vibrant craft beer scene in Australia. Brewing is inherently wasteful, especially, in terms of water use. One of the chief consumers of wastewater is the process of chilling.
Thus, as a means of conserving water, some inventive homebrewer(s) came up with the no-chill method.
Summary of pro number one: save water.
Save Time
If you basically eliminate a step in your brewing process, you will save time. By not taking the time to chill you beer rapidly, you are saving not only the time it will take to do said chilling but you are also saving time with cleaning. No more chiller to clean.
Summary of pro number two: less cleaning, less chilling, = more time for more important things. For example, drinking a homebrew.
Save money
No expensive chillers needed here thank you. I’ll use that money for another keg.
Cons of No-Chill
There are a few noteworthy drawbacks to using the No-chill method.
Risk of Botulism
Botulism is one nasty illness. The toxins that are produced by the bacteria Clostridium Botulinum makes cyanide look harmless. It’s literally the worst toxin in the world for humans.
For a more indepth dive into the world of brewing and botulism, take a look at this post from Brain over at Sui Generis. Brian is a real scientist and knows his stuff.
The key takeaways for botulism in beer is this. It could theoretically be produced in wort. That risk is also theoretically increased with the no-chill method. But only if you are storing your wort for more than a day and a half.
That said, there are no known cases of botulism resulting from any homebrewing practices including no-chill. That’s none, zilch, nada.
I reckon a good healthy respect is good, as is, looking at the data and making an informed decision. If I choose to no-chill, I’m not going to keep containers of wort sitting around for longer than it takes to get to my pitch temp.
Isomerization Issues
When you use the no-chill method, your wort will remain at isomerization temps for a lot longer than “normal”. Alpha acids will isomerize into iso-alpha acids at temps of 175 F (79 C) and above.
This will effectively make your beer more bitter. Careful recipe design can negate this a lot but it will take some trial and error. Even so, many brewers avoid making IPAs using the no-chill method.
No Cold Break
Rapid chilling produces cold break. Cold break helps proteins to clump and drop out of solution leaving you with a clearer wort that will in turn lead to clear beer.
With no-chill brewing, there is no cold break so you will end up with a slightly hazier beer. This haze can, however, be mitigated by using the usual clarification techniques.
DMS (Dimethyl Sulfide)
In theory, DMS can form in your beer if you use the no-chill method. See this article for more on DMS. In this day and age of modern malting techniques, DMS is not a huge concern. If you’re paranoid or using heritage malted malts, give your brew a good 90 minute boil and you’ll eliminate the precursor.
What Container is Best for No-Chill
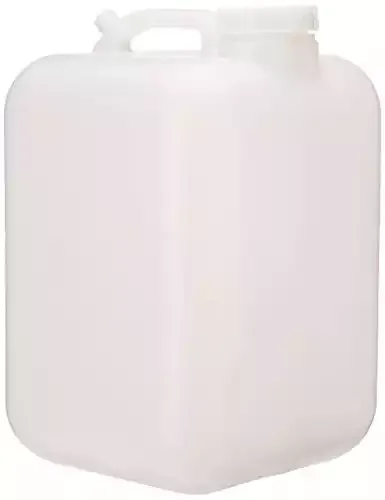
This HDPE container is square-shaped and equipped with a heavy-duty carrying handle. Perfect for no-chill brewing.
You’ll want to use a container that can handle a lot of heat and won’t leech a bunch of testicle (or ovary) mutating chemicals into your wort.
Don’t try no-chill with a PET (Polyethylene Terephthalate) container. You’ll get a melted mess and nothing more. Don’t use glass! Eventually, you’ll end up with a bunch of broken glass and a mess.
The most popular option is a solid HDPE (high-density polyethylene) container. Many of these come in 5 gallon sizes and can also be found in larger volumes. I’ve used a 7 gallon HDPE container, formerly used to bring water on camping trips, with good success.
Kegs are another great option for no-chill cooling. And if you ferment in kegs it could be a win-win. It will save you the trouble of transferring after cooling has occurred.
I have also used my HDPE fermentor to no-chill in. It’s nice to simply rack the hot wort into the fermentor, let it chill overnight, oxygenate, and pitch my yeast.
Easiest Styles to Brew with No-Chill
There are definitely some styles that lend themselves to no-chill brewing. Most notably, styles that don’t have complex hopping schedules.
My personal favorite is to use a kveik strain when I am no-chill brewing. I’m impatient and using kveik allows me to pitch the yeast once my wort has cooled to 86 F (30 C). This method fits easily with brewing more traditional Norwegian Farmhouse styles.

With some brewing traditions facing near extinction, author Lars Marius Garshol set out to explore and document the lost art of brewing using traditional local methods.
Saison is another style that lends itself to being brewed with the no-chill method.
The basic idea here is what I mentioned before. If you have a beer that has a simple hopping schedule, it’s a good candidate for no-chill.
Tips for Brewing IPAs
For the adventurous and innovators, you can still brew IPAs using the no-chill method. But it will take a lot more thought about when you add hops.
Consider moving to no boil or a tiny-itty-bitty hop addition during the boil. Save your boil-addition hops and add them into the container when you transfer the hot wort. If you keep an eye on things, you can add a nice long whirlpool addition at a temp under 175 F (79C). After that, simply dry-hop as you do.
Final Thoughts
No-chill brewing is practical and efficient. Depending on where you live, it’s a nice option for some and basically a requirement for others. I’m in favor of no-chill brewing because it offers alternatives for brewers that are into conserving both water and their hard earned cash. If in doubt, try it out.