Adjusting your water for homebrewing can take your beer from good to great. A little attention to detail and a bit of applied chemistry can really make the difference.
Water adjustment for homebrewing is easier than it seems. You don’t need a degree in chemistry to make practical changes to your brewing water. By starting with good tasting water and adding the right brewing salts, you’ll be able to dial in your recipes to make award winning homebrew. Brewing software takes care of the calculations so you can be confident with your adjustments.
Follow our step-by-step guide to start adjusting your brewing water. Once you’ve got the basics, you can always dive deeper into the science. For most homebrewers, a basic understanding of how water affects beer is all they need to consistently brew world-class beer.
What water is best for brewing?
Water is the main ingredient in beer. Great tasting water is a prerequisite for great tasting beer. The flavor of water is obviously very subtle. If you’ve ever tasted different bottles of mineral water, you might have a favorite – but unless one is overly high in salts – they mainly taste the same.
If you have good tasting water, you can use it for homebrewing beer. That said, for brewing, there is more to it than simply flavor. Ion concentrations in water affect the taste of finished beer, but also the pH, mouthfeel, clarity, and stability.
There is no single best brewing water. Certain styles benefit from certain water profiles. What’s most important is that you know the constitution of your brewing water, and how you can adjust it to suit the particular beer style you’re brewing.
Traditional beer styles were historically developed in part due to the local water source. Sulphate rich water in Burton upon Trent – famous for bitter, hoppy ale – helped accentuate hop bitterness to make amazing IPA. Pilsners, on the other hand, benefited from the soft, neutral local water supply of Pilsen, Czech Republic.
Homebrewers have the benefit of tweaking water chemistry to obtain precise profiles to brew any style.
How do I know what’s in my water?
Before you can even begin to think about adjusting your water for brewing, you need to know what’s in the water that you brew with! There are a few ways to know what’s in your water:
Local water report
If you get your water from a municipal supply – like most city dwellers – you should be able to find your local water report. Search online or call your water company to find a recent water report for your neighborhood. The more local and the more recent, the more accurate.
Get it lab tested
For the most accurate water data, send a sample of your tap water to a lab. The most popular water analysis lab for homebrewers is called Ward Labs. They have a lot of experience testing water for brewing purposes and you can trust in their report. They’ll provide all the details you need to accurately adjust your water using any brewing water software.
Start with Reverse Osmosis, distilled water, or bottled mineral water
It’s always a smart idea to build your water profile from a clean slate. With a very neutral water, you can add the exact brewing salts you need to match any desired profile.
If you have a reverse osmosis (RO) system at home, this is a great option for brewing. RO is a filtering process that removes almost all contaminants, chemicals, and ions from water. This leaves you with an excellent base to build any water profile for brewing. Similarly, you can start with distilled water which has no ion concentration at all.
Mineral water will have the water composition listed on the side of the bottle or website. Not all bottled waters are equal and some may not be suitable for brewing if they’re too high in salts. Generally, bottled water with low minerality is preferred. From there, you can add in the salts you need to make an accurate adjustment.
What’s in my water and why is it important?
Chlorine and Chloramine
One of the major causes of off-flavors in homebrew are chlorine and chloramine in water. Many municipal water supplies use these chemicals to kill bacteria. Unfortunately for brewers, they cause a medicinal or plastic-like taste in beer.
To remove chloramines and chlorine, filter your water through a carbon filter. Another easy solution is to use a campden tablet (potassium metabisulfite). One tablet treats 20 gallons of water. You can easily crush a tablet to add the quantity you need to brew. Just add it to your strike water or hot liquor tank (HLT) when you start your brew day.
Water Ions
Water reports can have a lot of data. For brewing, you really only need to focus on a few key components:
| Ion | Effect | Recommended Range |
| Calcium (Ca+2) | Promotes clarity Good for yeast nutrition | 50 – 200 ppm |
| Magnesium (Mg+2) | Good for yeast nutrition | 10 – 30 ppm |
| Sodium (Na+) | Enhances mouthfeel Too much will taste salty | 0 – 100 ppm |
| Chloride (Cl–) | Accentuates malt Adds softer mouthfeel | 0 – 250 ppm |
| Sulfate (SO4-2) | Accentuates hop flavor Accentuates bitterness | 0 – 250 ppm |
| Bicarbonate (HCO3-1) | Effects pH | 0 – 200 ppm |
Bicarbonate and Alkalinity
Most brewing water software uses an input value of bicarbonate as HCO3. However, many water reports give a value of alkalinity as CaCO3.
Use the following formula to convert, as needed:
Alkalinity (as CaCO3) x 1.22 = Bicarbonate (as HCO3-)
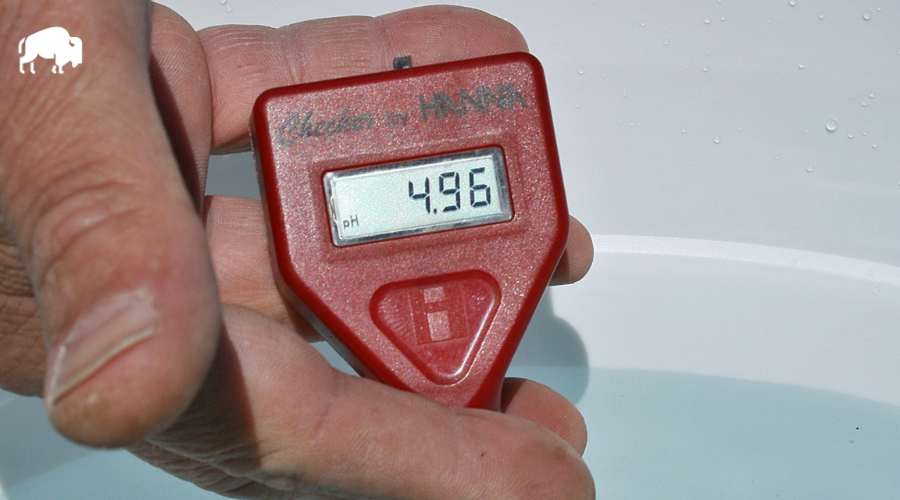
pH
pH is the measure of the acidity or alkalinity of a liquid. 7.0 being neutral, below 7.0 being acidic, and above 7.0 being basic. The pH of your source water isn’t really of interest to brewers as long as it’s somewhere between 5.5 to 8.
When brewers talk about pH, they’re almost always referring to mash pH. Mash pH is a function of the water, grain, brewing salts, and acids and should be between 5.2 and 5.5. The pH will be dialed in during the water adjustment process.
What do I need to adjust my water?
To adjust your water, you’ll need the following equipment:
- Gram scale (0.1 gram precision)
- Light plastic weighing tray or bowl
- Graduated cylinder with 1ml divisions (nice to have)
- Digital pH meter (optional but ideal)
To calculate water adjustments, use one of the following programs:
- Bru’n water: Free Excel spreadsheet, or a more advanced version for supporters
- BeerSmith 3: Complete brewing software with intuitive built-in water calculator – Our recommendation
- Brewer’s Friend: Free web-based water software
You’ll need most of the following salts and chemicals, depending on your source water and desired beer style:
- Gypsum (CaSO4): Very common addition to raise sulfates
- Calcium chloride (CaCl2): Very common addition to raise chlorides
- Epsom salts (MgSO4): Increases magnesium and sulfates
- Canning salt (NaCl): Raises sodium and chlorides
- Baking Soda (NaHCO3): Increases mash pH
- Lactic acid (88%): Lowers mash pH
How do I adjust my water?
Adjusting water for homebrewing requires a computer based calculator. Calculating by hand is certainly possible if you have a solid grasp on water chemistry. For us, we always use software for accuracy, consistency, and ease.
The best way to look at water calculation is taking it in two steps: the calculation and the brew day.
We recommend first spending some time designing your recipe. Then carefully input the variables into the water calculation software. When it comes time to brew, all you need to do is add the salts and acids to the brew.
Perform Water Adjustment Calculation
Step 1: Design your recipe
Design your recipe (or pick out a kit) to your liking, choosing the malt, hops, and yeast.
Step 2: Input your source water profile
Take your water report and input your source water profile into your brewing water software. Pay attention to units, 1 ppm = 1 mg per liter = 1 mg/L.
Focus only on the water ions useful for brewing, as we listed above.
Step 3: Input your grain bill
Input the grain bill, including weight and type of grain into the brewing water software.
The type of grain changes the chemistry. Dark malts and crystal malts, being naturally acidic, lower the pH much more than base malts.
Step 4: Input mash and sparge volumes
Mash and sparge volumes are required for the brewing water software to perform its calculation. For no-sparge, brew in a bag, or all-in-one systems like the Grainfather, set the sparge to 0 gallons and the mash to the full volume.
Step 5: Input desired water profile
Whatever style of beer you’re brewing will have an optimal water profile. Some brewing water software have built-in lists. Otherwise, we recommend consulting Brewer’s Friend’s convenient list of common water profiles.
Step 6: Adjust water to match desired profile and pH
If your software doesn’t automatically match the desired water profile, you will need to manually add salt additions to hit your target. Through trial and error, you’ll end up with a correct water adjustment. Don’t worry if you’re a few ppm off in any one ion category.
It takes some practice, but you’ll eventually start to see the logic. Start by adding a few grams of gypsum and calcium chloride. You’ll see changes in sulphates, chlorides, and calcium. Try to find a sweet spot to hit your desired range. Continue adjusting with other salts until you’re satisfied with the results.
Most importantly, is mash pH. As you add salts, the pH will change. Make sure to end with a final mash pH between 5.2 and 5.5. You can lower the pH by increasing the lactic acid addition. If you’re low, some baking soda (sodium bicarbonate) will raise it.
Water Adjustment on Brew Day
Now that you’ve done all the math, it’s time to get the brew going!
Step 1: Mill grain, heat strike water, and add campden tablet (optional)
Start out your brew day by milling the grain and heating the strike water. Treat your brewing water with a campden tablet, if your water has chloramines or chlorine. Add half a tablet to treat 10 gallons. Crush the tablet and add it right to your strike water or HLT.
Step 2: Weigh out salts and measure lactic acid
Using a gram scale, weigh out the salts. For the lactic acid, use a precise graduated cylinder. If you don’t have anything precise, you can use your gram scale assuming that roughly 1 gram = 1 ml of lactic acid.
Step 3: Mash grain
Mash in and give your grains a good stir, as normal.
Step 4: Add salts and lactic acid to mash
Stir in the salts and lactic acid into the mash.
Step 5: Allow to rest 5 minutes and check pH of the mash
If you have a pH meter, check the pH of the mash after 5 minutes.
Pull a sample (liquid only) and allow to cool to room temperature. The pH should be in the correct range of 5.2 to 5.4.
If you need to make an adjustment, add 1 mL of lactic acid (to lower pH) or 1 gram of baking soda (to raise pH).
Make the adjustment, stir the mash, and let rest for 5 minutes. Check pH again and repeat the adjustments as required. As long as you’re in the ballpark, you should be fine. pH is difficult to fine-tune once the mash has begun.
Step 6: Finish mash
Allow the mash to finish, checking for conversion if desired.
Step 7: Add salts and lactic acid to sparge water (optional) and sparge
If you’re treating the sparge water, add the salts and lactic acid to the hot liquor tank. Sparge and collect the full volume in the boil kettle.
Step 8: Finish brew as usual
Boil, add the hops, chill, and pitch the yeast.
Brewing Water Video Course
If you want more instruction on how to evaluate and to adjust your brewing water, check out this Craft Beer & Brewing video course:

Brewing Water: A Practical Approach will teach you the basic information you need to evaluate your water and make the adjustments needed to brew the best beer possible.
It’s free for the first 30 days giving you access to over 60 homebrewing courses from the best brewers in the business.
Final Thoughts
Water chemistry can be a daunting subject for homebrewers. With so many variables, the learning curve can be steep. Starting simple, making a few adjustments, and tasting your results is the best way to learn. We think you’ll see immediate positive results by paying closer attention to your brewing water.
Once you get comfortable making basic water calculations and adjusting your homebrew, you can dive deep into the science.
We recommend the following comprehensive books: Water: A Comprehensive Guide for Brewers (John Palmer and Colin Kaminski) and New Brewing Lager Beer: The Most Comprehensive Book for Home and Microbrewers (Greg Noonan).
Frequently Asked Questions
Should I adjust my water for extract brewing?
Extract brewing uses concentrated wort that has been made by commercial producers. They have already adjusted their mash for their desired results. Because of this, adjusting water chemistry for extract or partial mash brewing is not necessary.
For extract and partial mash brews, you should treat your brewing water with a campden tablet or use reverse osmosis (RO) or bottled water. Chloramines and chlorines are the cause of very common off-flavors in homebrew and can easily be avoided with that simple step.
Can I use acid malt / sauer malt / acidulated malt instead of lactic acid?
Yes, most water chemistry calculators have an option to choose either lactic acid or acidulated malt. We recommend using lactic acid because it’s precise and convenient to have on hand.
Acid malt is essentially just malted barley that has been subjected to a lactic acid fermentation. Unless you’re following the Reinheitsgebot, using lactic acid for pH adjustment is more practical.
Another option is food grade phosphoric acid, which is commonly used in commercial breweries.