Are you ready to move past extract brewing, but don’t have the equipment or time to jump into all-grain brewing? Partial mashing is an excellent way to split the difference. Your recipes will be more flexible with the variety of malts you can use. Partial mashing also introduces you to fundamental brewing techniques for all-grain brews.
Partial mash brewing is a technique used in extract brewing. You replace some of your extract with grains, and then hold them at mashing temperature for an hour to extract the sugars. It’s easy, improves your brews, and requires very little equipment.
Not every grain is made into an extract. By learning how to partial mash, you’ve widened the horizons of what recipes you can make. You also learn how to mash and sparge, which are essential for a lot of all-grain brewing.
We’ll take you through the steps so you can mash with confidence, from planning to fermenting. We’ve also given you a quick overview of full-wort boiling, a common technique combined with partial mashing.
What is Partial Mashing?
Partial mashing is a popular method of mashing some grains in your extract brewing. It can add complexity to your wort and increases the range of recipes available to you as an extract brewer.
The basic idea of partial mashing is holding a bag full of grains at a specific temperature on your stove. Usually, this is around 150 degrees Fahrenheit, but it may vary a bit. This temperature will extract sugars from your grain, as well as compounds that add depth to beer.
Partial mashing is a simpler version of what all-grain brewers do with their grain, which is why it’s such a significant intermediate step. All-grain brewers mash all their grains instead of adding highly concentrated extract.
Equipment
The great thing about partial mashing is its simplicity. You likely have almost all the equipment already. Because of the small amount of grain you’re mashing, it can be done on your kitchen stove.
Kettle
You will need two kettles for partial mashing. The first kettle is the strike water, which is then turned into your partial mash when you add grains. The second kettle is the sparge water. The sparge water is heated to about 180 degrees and used to rinse the grains after mashing.
Both of these kettles need to hold about 5 gallons of liquid. If you upgrade to full all-grain brewing, you’ll need a larger kettle. These smaller ones will still be useful at that point, though, so it’s not a waste.
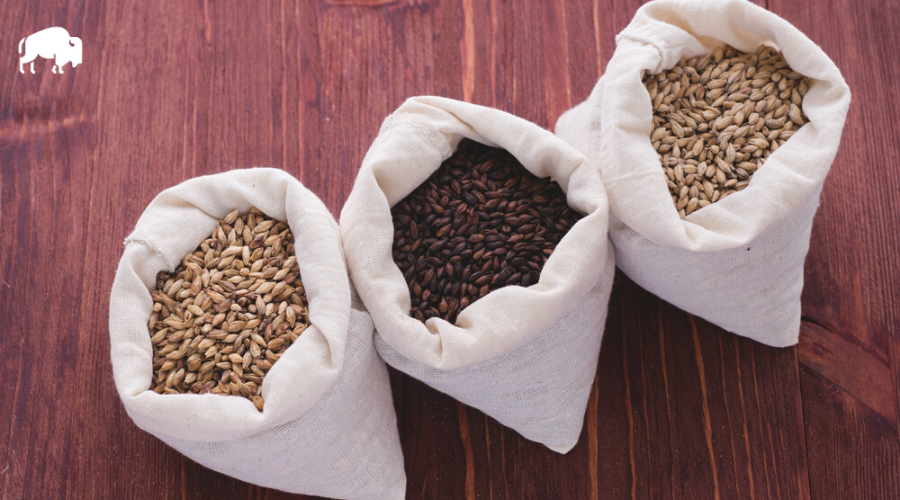
Steeping Bag
You may not already own a steeping bag, but they’re cheap and easy to buy. These are bags made of mesh or muslin, designed to hold the grains during mashing. Some of them are disposable, but most are washable and reusable.
You can buy these in any local homebrew store or online homebrew retailer. They’re also available on Amazon, usually for under 10 dollars a bag. A hop bag will also work in a pinch, but they sometimes have smaller holes to allow less hop matter into the beer.
Other Equipment
You will need an ordinary kitchen strainer to complete a partial mash. You probably already have one of those and don’t need this warning, but just in case. The ideal strainer will be able to sit on top of your kettle.
An upgrade to full-wort boiling often accompanies an upgrade to partial mashing. Full-wort boiling involves adding all your water to the boil. This upgrade usually means updating your equipment as well.
If you’re interested in full-wort boiling, you’ll need a larger kettle. Ten gallons is a typical size to upgrade. Check out our article on the best brew kettles to see which ones we recommend.
You might also want an outdoor gas burner for efficient heating.
The final extra piece you’d need is a wort chiller. When you’re not adding cold water after the boil, you need another way to cool down the wort fast. A chiller can be as simple as an ice bath in a tub, or as complicated as an expensive counterflow system.
Ingredients
The ingredients for partial mashing are almost identical to extract brewing. The only difference is that there’s a little less extract and a little more grain. You can either find a recipe that already includes partial mashing, or convert a full extract one.
The rule of thumb is to divide liquid malt extract weight by 0.75 to get the corresponding amount of base malt. This is true for pilsner malts and pale ale malts, but it’s essential to read the extract labels. Some liquid extracts contain two types of malt in one.
Sample Recipe
Here is an example of the ingredients that you may need for a partial mash. This recipe is from Brew Your Own magazine, a great resource that we often use as a reference. This recipe is a dry Irish stout, but the concept is the same regardless of the style.
- 3.5 lbs extra light dried malt extract
- 1.5 lbs pale ale malt
- 1.5 lbs flaked barley
- 1 lb roasted barley
Partial Mash Process
This process may seem complicated at first. It’s easy to follow, though, so don’t lose heart. Mashing grains is a lot like making grain tea. By following the steps below, you’ll be up and running in no time.
Planning
The planning stage involves deciding which grains to use and how much of each. If a grain in your recipe isn’t available in extract form, you will need to do a partial mash to extract its sugars. This is common for specialty malts and wheat malt.
You may also choose to replace some extract with a partial mash for complexity in your beer. Malt extract comes from a very tightly controlled process in a big brewery. This means that you can rely on malt extract to be the same every time. Mashing can create unexpected results, sometimes in great ways.
Heat Water
Heating water is straightforward for partial mashing. The amount of water is usually around one to three gallons, but it depends on the amount of grain you’re mashing. If your recipe doesn’t give you your strike water volume, about 1.5 quarts per pound of grain is a good rule of thumb.
You must also heat the strike water to a bit above your mashing temperature. This is because the grains are at room temperature and drop the water temperature when you add it. About 10 degrees above mashing temperature is a reasonable estimate, but this can vary.
Most mashes happen at about 150-155 degrees, so you should heat the strike water to around 165 degrees. It can be easily adjusted once you add the grains using cold or hot water as well.
Steep Grains
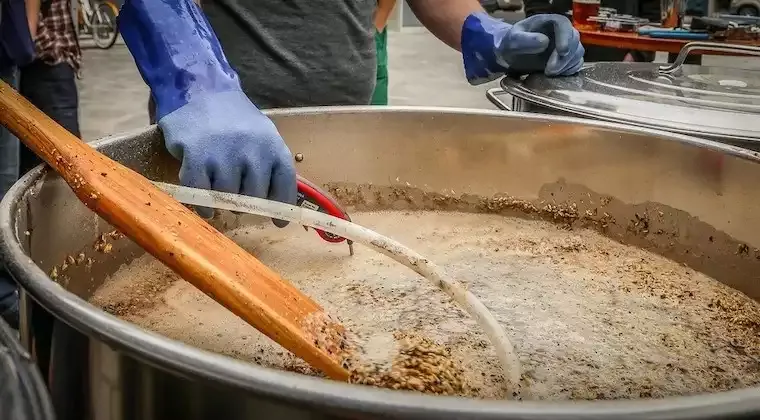
The next step is to put your grains inside your steeping bag and the bag inside your strike water. If you can, secure the bag open by folding it back around the edges of the kettle. This gives you the ability to stir the grains and ensure there are no clumps. If you can’t make that work, securing it to the edge of the pot works.
After you add the grains and stir, check the temperature of your water. Add hot or cold water to adjust until the temperature is within mashing range. You will then hold it at that temperature for the length of time the recipe lists, usually an hour. You can do this by heating the kettle or by adding hot water.
Sparging
Sparging is where the second kettle comes in. While you are mashing, you should heat the rest of the water for your pre-boil volume to about 180 degrees. Once the mash is over, remove your grain bag from the wort.
Place your strainer on top of the kettle and your grain bag in it. Open the bag, spread the grains out in the strainer, and pour the heated water slowly over the grains. This will rinse the rest of the extracted sugar off the grain.
This step isn’t entirely necessary for partial mashing. You’ll also add extracts with very high efficiency, so the boost from sparging isn’t as important. This is a smaller version of sparging for all-grain brewing, though, so it’s good to practice. Higher efficiency is never a waste.
Boil
This part of partial mashing is no different from extract brewing. Add your liquid extract to the kettle with the wort you just mashed and bring it to a boil. Add your hops as directed on your hop schedule.
Full-Wort Boil
Doing a full-wort boil is optional, but many homebrewers upgrade to it at the same time. A full-wort boil is when you boil the entire volume of water instead of adding the majority after the boil.
When brewers boil extract in such a small volume, it’s easy to caramelize and darken your wort. This prevents a lot of extract brewers from making lighter beers. You also have to use fewer hops, because more dilute wort is better at extracting hop oils.
If you want to try a full-wort boil, dilute your boil with water you’d typically add at the end. You may need to use something more powerful than a stove, though. A lot of homebrewers use propane-powered outdoor burners for this purpose.
Chill
If you aren’t doing a full-wort boil, chilling is easy. You add cold water to the boil up to your final volume. The best way to do this is to refrigerate your water overnight. During the sparge, slowly add the hot wort to it, stirring constantly.
If you’re doing a full-wort boil, this isn’t a possibility. Instead, you have a few options for chilling your wort. You can put the kettle in an ice bath, replacing the ice as it melts. You can buy an immersion chiller and attach it to your sink or hose. On the high end, you can use a counterflow chiller to cool your wort in a few minutes.
If you’ve boiled the full volume of water, you’ll also need to aerate the wort. The boil forces all the oxygen out the wort, and the yeast needs that to make alcohol. To do this, you can stir it with a lot of splashing, shake the fermenter, or inject oxygen directly into the wort.
Partial Mash Brewing Video Course
If you want to learn how to partial mash from start to finish, check out this Craft Beer & Brewing video course:
Brew beer like the big leaguers at home. This comprehensive course teaches you everything you need to know to brew great beer using the partial mash or all-grain method. From raw ingredients to pouring your first pint of homebrew and everything in between, get started with this course.
It’s free for the first 30 days giving you access to over 60 homebrewing courses from the best brewers in the business.
Final Thoughts
Partial mashing is a great middle-ground between full extract and all-grain brewing. It gives you so much more flexibility than relying on extract alone. It’s also more convenient than mashing a large amount of grain.
You can try this technique in your kitchen, so there’s nothing to lose. Try it out and let us know what you think!
Frequently Asked Questions
What’s the difference between steeping and mashing?
Steeping grains for extract brewing involves holding grain at a temperature of 160-170 for about half an hour. Partial mashing keeps grain at a temperature of 150-155 for about an hour. You can only steep grains that already have fermentable sugars available.
You can steep most specialty grains, such as caramel or chocolate malt. Base grains such as pale ale or pilsner must be mashed.
What is the partial mash water to grain ratio?
The water to grain ratio for partial mashing helps you calculate how much water to use for the mash. The ratio is 1.5 quarts of water to each pound of grain. For example, a partial mash with 4.2 pounds of grain would have 6.3 quarts of water.