Homebrewing mixed fermentation beer was once reserved only for die-hard funky and sour brewers. In recent years, the homebrewing community has taken a giant leap forward in making sour beer more accessible to brew at home.
Resources like Milk the Funk and American Sour Beers have given thousands of homebrewers the inspiration to begin their mixed-fermentation journey.
We want to talk about how to start a solera, our favorite way to brew mixed fermentation beer at home.
How do you start a solera?
To start a beer solera at home, you’ll need a suitable solera vessel. First, decide how big you want to go – a great size for homebrewers is 10 or 15 gallons. Your solera vessel can be an oak barrel, stainless steel Sanke keg, plastic fermenter, or even a standard carboy. Brew your first solera beer, ferment it in a primary fermenter, and transfer it to your solera vessel with a healthy mix of yeast and bacteria. Your solera project is off and running!
What is a solera?
Generally, solera is a method of aging and blending liquid consumables like wine, sherry, balsamic vinegar, port, and of course: beer!
The basic idea is you have numerous barrels of different ages from which you will pull from to blend and bottle. After that, you transfer liquids from youngest to oldest in chronological order down the line.
With this process, you are creating a complex product where the average age gradually increases over the years. For beer, soleras are typically used in mixed fermentation, long-aged ales. The blend of yeast and bacteria inside the solera vessel evolves and matures over time. This results in complex beers with characteristic funkiness and/or acidity.
On a homebrew level, it’s impractical to have many barrels of aging beer. But with the use of one vessel, we can pull portions of the fermented beer at various intervals for packaging or blending.
Then the vessel can be topped off with fresh wort to create the same effect as a traditional solera.
Why start a solera project?
A solera is a convenient and fascinating method for producing mixed fermentation (i.e. sour or funky) beer at home. Inside of a solera vessel, yeast and bacteria work harmoniously to develop interesting and complex flavors over time.
Solera is one of the most practical methods for making a diverse range of sour beer at home. Instead of having multiple carboys, fermenters, or barrels taking up space in your cellar, you can work from one main vessel. Every brewing cycle – say 4 to 8 months – new bottles are filled and fresh beer is added to the solera.
Soleras allow homebrewers to have a constant stream of mixed fermentation beer that can be consumed young or aged in the bottle for years.
1. Planning your solera project
The first step in starting a new solera project is deciding on the volume of beer you want to have aging at all times.
At the homebrew level, the most practical volumes are 5 gallon (19L), 10 gallon (38L), or 15 gallon (57L). Larger vessels are possible as well if you plan to brew and bottle a lot. If so, your brewing system’s size should be at least half of the volume of your solera vessel.
Primary fermentation can take place in any fermenter like a carboy, brew bucket, stainless steel conical, or FermZilla. It’s a good idea to undergo a primary fermentation before transferring to the solera vessel. This keeps excess trub and yeast sediment out of the solera vessel and produces clearer beer and makes transfers smoother.
For the primary fermenter, be aware that using a mixed culture with lactobacillus, pediococcus, and brettanomyces can contaminate future “clean” fermentations (i.e. saccharomyces only). Most homebrewers use separate equipment for their “clean” beers and mixed fermentations.
2. Find the right solera vessel(s)
Once you’ve assessed your volumetric needs, it’s time to find the right vessel.
First, you need to decide if your solera program will be a single vessel or multi-vessel system. For homebrewers, we highly recommend a single vessel.
Single vessel solera
Using one vessel means aging beer in a single solera vessel, pulling off a portion for packaging, and topping up that same vessel with fresh beer. This process repeats every brewing/packaging cycle.
This is the preferred method for homebrewers as it doesn’t take up much space. It’s a minimal and simple solution to produce great-tasting solera beer.
Multi-vessel solera
A multi-vessel solera is the traditional method. At the homebrew level, this is less practical but if you have the time and space it might be worth considering.
Multi-vessel solera programs offer a wider range of flexibility when it comes to blending. Choosing between various solera vessels to blend beers can really help dial in specific flavor profiles. For example, you can blend a very sour barrel with a less sour barrel to temper acidity.
Materials
There are four main materials you can choose for your solera vessel:
Oak
Oak is the traditional material for allowing oxygen permeability as well as imparting oaky notes and tannins. Oak vessels can be typical oak barrels or specially designed foeders, like the Foeder Smith Mini Oak Foeder.
Stainless steel
Limits oxygen ingress which can help slow or control certain souring bacteria. Stainless is very easy to clean, sturdy, and reliable. Used or new Sanke kegs (15.5 gallon) make great, economical options for stainless steel soleras. Stainless steel conical fermenters are also a great choice (though more expensive). They’ll often come with useful ports for dumping yeast, transferring beer, and cleaning.
Glass
Glass carboys or demi-johns come in 6.5-gallon sizes. These are basic, inexpensive, and readily available for homebrewers. Be sure to keep glass soleras covered and away from light.
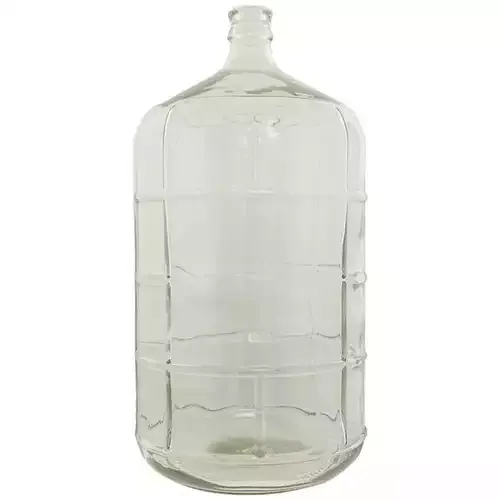
The large 6.5 gallon size of this carboy fermenter is perfect for 5 gallon batches as there is plenty of head space to avoid blow-off during fermentation.
HDPE (Plastic)
Plastic has adequate oxygen permeability for souring bacteria. They’re also light, easy to handle, and can be fitted with a spigot. Speidel makes some great, ready-made options for a solera vessel.
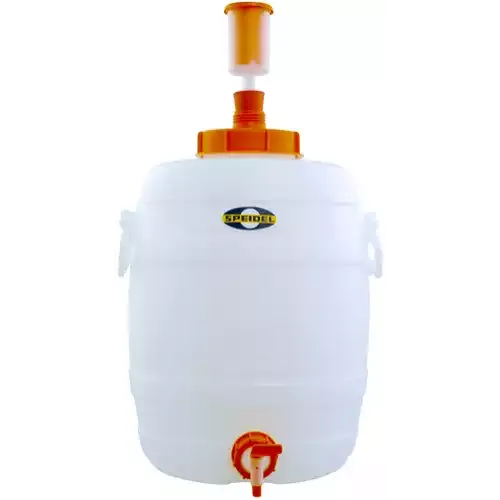
These heavy-duty HDPE plastic tanks offer a fantastic fermentation & storage solution at a great price.
Note: If using a non-wooden solera, you can add a handful of oak cubes to the vessel to impart light oakiness and tannins.
3. Prepping your solera vessel
Your solera will remain in place for possibly years to come. Make sure you put it in a good location, with consistent ambient temperatures around 68°F (20°C). You won’t want to move the solera once it’s filled, especially if it’s 10 gallons or larger.
If using an oak solera vessel, make sure you’ve checked it for leaks and are storing it properly. See our guide on how to barrel age beer for recommendations on sanitizing, cleaning, and storage of your oak solera vessel.
4. Brewing your first solera beer
Lambic brewers rely on producing wort with complex carbohydrates and proteins. This ensures those lengthy barrel fermentations have adequate food to chew through over time. They accomplish this through what’s known as a turbid mash.
For solera fermentations, a turbid mash is also a good idea. At the homebrew level, however, they can be complicated and lengthy to undergo.
Instead of a turbid mash, consider using a step mash along with the use of unmalted wheat in the grist.
Perform primary fermentation in a typical fermenter of your choice. Then, transfer to the solera vessel after most of the primary activity has slowed down.
Yeast selection
Some brewers prefer to perform a “clean”, saccharomyces-only fermentation in the primary. This is a good option if you don’t want to introduce bacteria into your “clean” brewing equipment.
Our preferred method is a mixed fermentation from the start. Pitching a blend of saccharomyces, brettanomyces, lactobacillus, and (optionally) pediococcus into primary fermentation gives all of the yeast and bacteria plenty of sugars to start working from.
Saison yeast strains make great candidates for the saccharomyces yeast. There are also many pre-mixed cultures from various yeast labs that are suitable for direct pitching, such as:
- White Labs – WLP655 Belgian Sour Mix
- Wyeast WY3763 Roeselare Belgian Sour Blend
- Bootleg Biology – Sour Solera Blend
- Bootleg Biology – Mad Fermentationist Sour Saison Blend
Alternatively, many brewers pitch bottle dregs from their favorite mixed fermentation beers. These can be dumped directly into the solera when adding the fresh beer.
5. Solera fermentation and aging
Once the solera is full and the mix of yeast and bacteria has been pitched, it’s time to let the mixed culture get to work. Don’t touch the solera for at least 3 months, preferably 6.
If you are too curious and must take a sample, be very careful to limit oxygen exposure. Too much oxygen can cause devastating off-flavors such as excess acetic acid production. Use sample ports when possible, or carefully take out some beer with a wine thief. It’s also a good idea to top off the solera vessel with CO2 any time you have to open it.
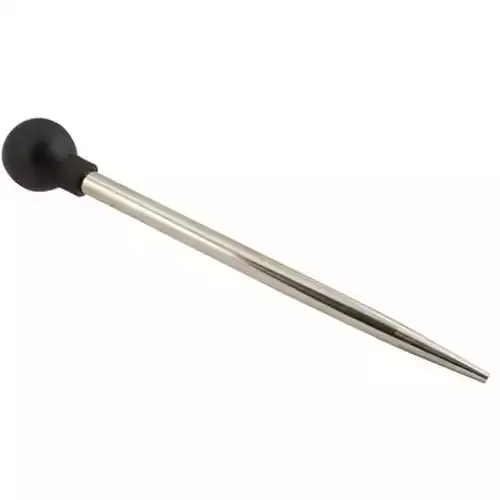
Stainless steel "turkey baster" type wine thief. Includes stainless steel tube, and a food-grade rubber squeeze bulb.
Solera Tips
- Don’t touch it for at least 6 to 12 months. Mixed fermentations take time for their flavors to fully develop. Over the course of a year, flavors inside the solera will change and evolve as the various yeast and bugs continually ferment.
- Once it’s time to sample, carefully taste the solera beer for any off-flavors. Often, time will help smooth out the beer and get rid of certain negative flavors. Other times, some flavors should be a cause for concern such as butyric acid (baby vomit, feces) and overly acetic acid (vinegar). If you notice these types of flavors, it might be necessary to count your losses and dump your batch.
- Make sure the airlock never runs dry! A dry airlock means that oxygen and contaminants can enter the solera vessel and spoil the beer.
- When the beer starts to taste great, you can prepare for bottling and planning your next brew day.
Next steps
A great solera program takes time for flavors to develop and for the beer to transform into something magical. Solera management and troubleshooting can be a complicated topic and we’ll address it fully in another guide.
Occasionally checking the progress of the flavors is important to understand what direction the beer is heading. Too sour? Next top-off brew should have increased bitterness. Not sour enough? Maybe introduce another strain of lactobacillus. No funk? Well, more Brett may be your answer!
Engaging in the world of solera beer is fun, unpredictable, and rewarding. Make a plan, gather your equipment, and get started on your long-term solera project today!