There is something innate in all us that wants to design and create. You’ve probably brewed a batch or two of beer following someone else’s recipes. This is a great way to get started in homebrewing but there will come a time when you’ll want to venture into the realm of recipe design. We’re here to provide inspiration and help you avoid some classic pitfalls of recipe design.
How to Design Homebrew Recipes
Recipe design is a process unique to each brewer. You can start with an idea, a flavor, a commercial beer or a sample recipe. Where you start will determine the next steps in the process. Remember to clearly define your goal, keep it simple and have fun.
Where to Start
As mentioned above, where you start depends on the kind of brewer you are. It also depends on how much experience you have as a brewer. Don’t feel limited if you’re a newer brewer, lean on those that have the experience you may lack.
Defining Your Goal
There are a lot of ways to select your target. Drawing inspiration from food is a common practice for some brewers. Others will find ideas from a visit to a super market or farmers market.
For the sake of clarity, the recommendation here is to look at a variety of flavors and imagine how you can translate those into a beer. That may involve actually adding a specific spice or seasoning. But it is just as likely to mean selecting a specific malt, hop, and yeast strain to give you your desired flavor profile.
As a quick anecdote, I love walking into a market while traveling or living abroad and looking for interesting ideas for things to put into a recipe. While living in China, I incorporated Sichuan Peppercorns into a Saison. Here in Puerto Rico, I’ve taken advantage of hibiscus to make some punchy, vibrant, and rose-esq, beverages.
Another method for getting started is to look at styles and compare recipes for that style of beer. Michael Tonsmeire recommends finding several examples of a style that are known to be good representations. Taste each example and draw inspiration from it and create the desired flavor profile for your recipe.
Newer Brewers
If you’re a new brewer, you’re likely better off starting by basing your recipe on someone else’s. This isn’t cheating! It’s smart. Don’t be proud. Do base your brews on the years of experience other people have.
If you start this way, you’ll avoid mistakes like using 40% crystal malt in a grist. There are those that will still try this. That’s fine. We all learn in various ways.
Just because you’re a newer brewer doesn’t mean you don’t have a lot of ideas for recipes. For example,you may have in mind a recipe for a cinnamon roll pastry stout. But you probably don’t know how to add cinnamon or vanilla or how much to use etc.. That’s why it makes sense to use someone’s recipe, at least as a starting point.
For the pastry stout mentioned above, it’s a good idea to look into each ingredient that comprises the flavor of a cinnamon roll. Then you’d need to ask yourself how you’re going to add those ingredients to your beer. This is where learning from other brewers’ experiences is really handy.
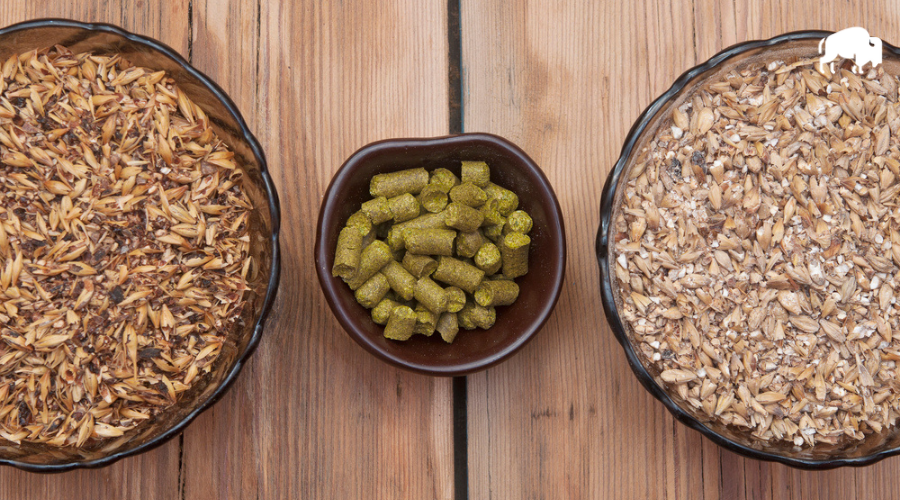
Getting to Know Ingredients
I personally have enjoyed exploring styles and familiarizing myself with ingredients by brewing recipes from Brewing Classic Styles. I usually make small adjustments to the recipes and have had great results.
Another great thing for newers brewers is to brew up some single-malt and single-hop beers. These are also known as “SMaSH” beers. The benefit of this approach is learning what flavors you can expect from a specific ingredient. This can be a somewhat limiting method.
If SMaSH brewing isn’t your thing, then keep your recipes really simple for a while. You’ll still learn what to expect from specific ingredients this way. Alternatively, taste a lot of other brewer’s SMaSH beers and learn from them.
Experience and Knowing What to Expect
There is something magical about knowing what to expect when you use certain ingredients. Instinct kicks in and the outcome becomes more certain. You can almost taste the beer before you brew it.
If you know what flavors to expect from a particular base malt, hop variety, specialty malt, yeast strain, and water profile, you can start to make combinations of your own. And you’ll be able to imagine with some certainty what the outcome will be.
When you have experience you can start with an idea and build the recipe out of thin air yourself. That said, there’s never any shame or reason not to reference some killer recipes for ideas and inspiration.
An Example Process
Now we’ll take a look at how I like to go about designing a beer.
Ingredients
Let’s say you want to brew a raspberry beer. Something that reminds you of raspberry pie. The first question is what will the base beer be? You need something that will let the berries shine. I’d go with a wheat beer.
Keep the grist simple. 50% wheat malt and 50% pilsner malt will work great. Malt should play a supporting role to the berry flavors.
For this beer, I don’t want the hops to get in the way of the malt. Using a hop like Magnum and doing one addition at 60 minutes will keep the bitterness clean and neutral. Target 15-20 IBUs. That should keep it refreshing and not overly sweet. For a beer like this, a harsh bitterness would be out of place.
Now for the yeast. The first thought may be a Hefeweizen strain but do I really want clove and banana? Something classic like the Chico (US-05 from Fermentis) strain or even a lager strain would allow for the expression of malt and berries. An English ale strain might be a nice way to accentuate the fruity flavors.
As for water, something with low minerality and maybe a bit of chloride should soften the mouthfeel and flavor. We don’t want the hops biting so lets stay away from high amounts of sulphates. Selecting a balanced or chloride heavy water profile in our brewing software will give us what we want.
Process
There are a ton of things to consider when it comes to process. Mash temp, boil length, when hopping is done, fermentation temp, how and when to add fruit…the list goes on.
For the purpose of our raspberry wheat beer example, we’ll stick with a simple mash schedule. Something like 60 minutes at 152 F is great. Add a typical 60 minute boil and away we go.
If using the Chico strain, fermenting at 64.4 F (18 C) will keep it super clean. This strain is really neutral in terms of flavor so if you wanted to bump it up to 66.2 F (19 C) you could.
Since we’re adding fruit. I’d wait to add it into a secondary fermenter. How much gets added depends on how prominent you want the flavor to be. I like to shoot for complexity and not flavors that overwhelm the base beer.
A half pound of raspberries per gallon of beer would be a good start. For a more solid expression of raspberries, go with a pound per gallon. Let it sit on the fruit for a week or two and package after test tasting.
That’s it! In this example, we went through each ingredient and some processes and made sure that our goal was met. My personal recommendation is to allow the raspberries to shine but not dominate. Make sure the malt supports and the hops and yeast stay out of the way.
If your goal is clear, the process becomes easier.
Batch Size and Scaling Recipes
It’s probably safe to assume that you already have your own target batch size. Most likely it’s 5 gallons. Whatever size you use, if you’re scaling recipes, it is really helpful to use software like Brewfather or BeerSmith.
Scaling recipes can be tricky but in general using percentages will get the desired result. If you’re looking at a 10 gallon batch and want to make 5 gallons of the same beer, you can enter the 10 gallon recipe into your preferred software and scale it that way.
Or you can simply add each ingredient at roughly 50% of what it was in the 10 gallon recipe. The key is making sure that if 80% of the grist was pilsner malt then it needs to be 80% or close to it in your new recipe. And so on and so forth for each ingredient.
When it comes to scaling hop amounts, double check that your IBU target is where you want it. Things don’t always scale perfectly. Cutting the amount in half when going from 10 to 5 gallons might not be exact. But it’s a good starting point.
When is it Ok to Call it Your Recipe?
Brewers new and old may feel a twinge of guilt when they call a certain recipe theirs. This probably happens when they’ve changed one ingredient slightly from another brewer’s recipe. If you’ve altered the recipe in such a way that the outcome would be distinguished as a different beer, then it’s probably ok to call it “yours”.
That said, stay humble and give credit where it is due.
Clone or Tribute
This is sort of a tangent. There are a lot of recipes out there that claim to be clone recipes. As homebrewers there is certainly nothing wrong with trying to make beers that taste like commercial beers.
The problem is that they rarely, if ever, taste exactly like the commercial beer. This could be poor recipe design but is most likely a result of equipment and processes.
It is more appropriate to consider a beer that is supposed to taste like Coors as a tribute to Coors. Or maybe “Coors inspired”. The issue with using the word “clone” is that, by definition, the term “clone” means it is exactly the same.
I didn’t come up with these ideas myself but stole them from Denny Conn.
Tips, Do’s, and Don’ts
Now it’s time to go over the “don’ts” of recipe design:
- Don’t use too many or too much specialty malt(s) (if you don’t know what too much is for a given recipe, look at comparisons).
- Don’t use 3 different base malts and 6 different specialty malts in a single recipe
- Don’t use 5 – 12 different hop varieties in a single recipe.
- Don’t waste hops by using them at 45, 30, 15, and 5 minutes during the boil in your NEIPA recipe.
- Don’t make a beer that is a slap-you-in-the-face-with-one-flavor beer.
Do
And now the list of what you ought to do to design killer recipes:
- Know thy beer (define your goal clearly from the start)
- Keep things simple with regard to ingredients
- Make sure there is a really valid reason for each ingredient and process
- Create cohesion between with flavors
- Tweak processes to achieve you goal (e.g., mash at a high temperature for less fermentable wort)
- Shoot for subtlety and complexity
- It’s probably heretical but…think outside the hop box occasionally. It’s ok to get tropical flavors from tropical fruit and not just from hops.
Intro To Recipe Development Video Course
If you want more instruction on how to learn to make your own recipes, check out this Craft Beer & Brewing video course:
Whether you like to drink over-the-top hop bombs or prefer the subtle pleasures of a British pub ale, you'll discover how to create and adjust recipes one ingredient at a time.
It’s free for the first 30 days giving you access to over 60 homebrewing courses from the best brewers in the business.
Final Thoughts
Designing recipes is a lot of fun. It’s one of the most enjoyable parts of the process for me. And the best part is that my design efforts are usually rewarded with delicious beer!
Designing incredible beers from scratch takes practice. The process is made easier if you have a lot of experience brewing and are familiar with what flavors you can get from various ingredients.
A great way to get started with recipe design is to look at a fewrecipes for a given style and make your own as a conglomeration of those recipes. Remember, this isn’t cheating. This is how you gain experience with ingredients.
The odds of getting the exact result you wanted your first time brewing a recipe you’ve designed are slim. Reiteration will be required or is at least advised. Stick with it and you’ll have an amazing recipe and beer to share with others.