Crushing grain is the first step of the brew day for homebrewers. Properly crushed malt is one of the most important parts to making great tasting all grain beer. Instead of buying your malt pre-crushed, why not start crushing your own?
Crushing your own malt makes better quality, more consistent beer and saves you money. Buying grain in bulk drastically lowers the price per batch. Milling at home also gives you complete control to dial in the perfect crush size. Crushing your own malt starts with measuring out the grain for your brew day. You then feed the grain through the hopper, and turn the mill’s roller either manually or with a power drill. The whole process takes between five and ten minutes.
Why Should You Crush Your Own Malt?
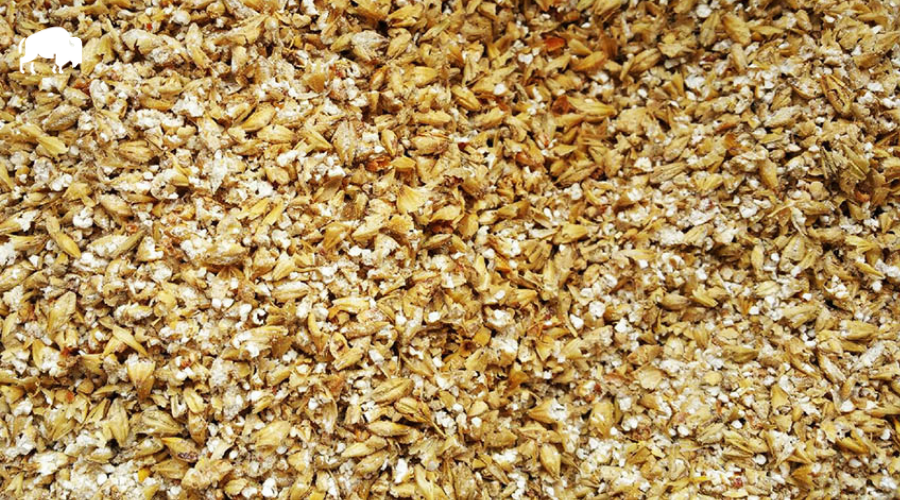
Grain must be crushed to extract fermentable sugars during the mash. A grain mill grinds brewer’s malt into husks, grist, and flour to make sure mashing is efficient.
An ideal crush will split the grain husk and pulverize the contents of the kernel, called the grits. The large surface area of the finely ground starch grits helps maximize extract yield. The husks act as a filter for the mash for the sweet wort to flow through during the lauter and sparge.
The fine balance between intact husks and pulverized grits is hard to achieve. Too fine a crush will destroy and pulverize the husk. Too coarse and the extract yield will be low.
So why not just buy pre-crushed grains at your local homebrew shop? Well, crushing your own malt has numerous advantages.
Crush size
Not all homebrew systems use the same grain crush. Not only that, but different grains also have different ideal crush sizes. Being able to control and optimize your grain crush for your system and your recipes will greatly help you make consistent brews.
Saving money
Does your homebrew supply shop charge extra to crush grain? Many shops charge a flat fee or price per pound to crush grain. Get your own mill to say goodbye to those extra costs.
Group buys / Storing grains
Another way to save some costs is by buying grain in bulk with friends or your homebrew club. You can split up a few different types of base malt and specialty grains and pay bulk pricing. When you’re ready to brew, you use your grain mill to crush your malt and get brewing.
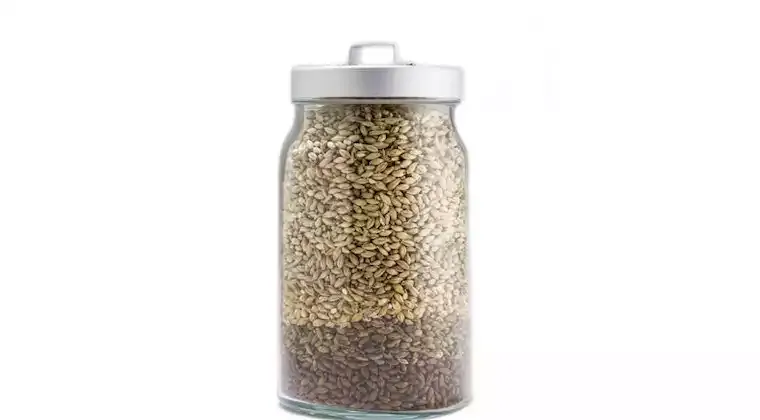
Having a mill also gives you the option to brew spontaneously. If you keep a small stock of grain, you can easily formulate a recipe and get brewing without going to the homebrew shop each time. You can store unmilled grain for about a year in a sealed container or grain bag.
What Tools Do You Need To Crush Your Own Malts?
Grain mill
Of course, to crush your own malt, you’ll need a grain mill. We’ll go over how to choose a grain mill later on in this article, or you can see our guide on the best grain mills for homebrewers.
Grain hopper
A grain hopper is a triangular basin that holds the uncrushed grain and feeds the mill as the grain’s being crushed. Many grain mills come with a hopper, but you might need to purchase or build one separately. You can make a simple hopper out of cardboard or sheet metal.
Grain mill base
Many grain mills come fitted with a base, usually made of wood. If yours doesn’t, you’ll need to make one.
Find a sturdy piece of plywood, about ½” to 1” thick. The base will need to fit over a bucket to catch the milled grain. It should be about 2” longer than the diameter of the bucket and 6” wide. Cut an opening for the grain to fall through and drill holes to line up with the mill’s bolt hole pattern.
Using a bucket lid is another great option for your mill’s base. You can fit the lid directly on to your bucket to catch the milled grain.
Scale
One of the benefits of crushing your own malts is being able to buy grain in bulk. However, when it comes time to brew, you’ll need to measure out the grain yourself. For this, you’ll need a scale.
For 5 or 10 gallon batches, each brew will use around 10 to 20 pounds of grain. Choose a scale that has a capacity of at least 10 pounds. You’ll need to weigh the grain in a few batches for larger brews.
Bucket
A bucket is required to catch the milled grain. A 6 gallon bucket can hold around 15 pounds of milled grain.
Power drill (Optional)
Using a power drill to crush your malt will make your life a lot easier, and the crush will be more consistent. Use a variable speed electric drill with a ⅜” or ½” chuck.
If you don’t have a power drill, you can always use a hand crank to crush the grains manually.
How To Crush Your Own Malts?
Crushing your own malt shouldn’t take more than 10 minutes from weighing to grinding if using an electric drill. By hand, it could take up to 20 minutes.
Follow these steps to ensure a consistent and proper crush.
Step 1: Set up mill, hopper, and bucket
Gather your equipment – the mill, hopper, bucket, and electric drill. Milling grain can be dusty, so it’s best to do it outdoors or in a well-ventilated area. You’ll also probably get some grain dust on the floor.
Step 2: Check and adjust crush size
Before you crush the entire grain bill, it’s always a good idea to verify the mill’s crush size. Run a handful of grain through the mill to make sure the malt is crushed to your liking. It should be a fine balance of cracked husks to pulverized grits.
If you need to adjust the gap, using a credit card to act as a guide for the space between the rollers. The card should loosely fit between the rollers for a good starting gap size.
Step 3: Weigh grain
Weigh out the entire grist for your batch of homebrew. If you’re using flaked products, like flaked oats, you don’t need to run these through the mill.
Step 4: Crush grain
Fill the grain hopper with your malt. Depending on the size of your hopper, you might need to fill it several times to crush all of the grain.
If using an electric drill, start slowly and gradually increase the rotational speed. It doesn’t have to be extremely fast – you should aim for a crush speed of about 8 pounds per minute.
If milling by hand, first stretch out your arm muscle a bit to avoid injury. Get in a comfortable position and begin turning the crank. You can crank as fast as you want, but try to be consistent. Depending on your batch size, you could be cranking for 5 to 10 minutes. It can be hard work but just remember the end goal – beautiful, refreshing homebrew.
Once you’ve crushed all the grain, you’re ready to start your mash.
Step 5: Clean mill
During your mash, don’t forget to clean the grain mill. Follow our detailed guide on cleaning your grain mill. Your mill should be cleaned off after every time you use it. Every now and then, you’ll also want to perform a deep clean of the mill to extend its life and keep it running smoothly.
Choosing a Grain Mill
There are plenty of great quality grain mill options on the market. Check out our recommendations here.
Grain mills should always have a high build quality. Milling grain is hard work. You want a mill that can withstand a lot of continuous grinding and repetitive use.
Here are some of the main things to consider when choosing a mill:
Number of rollers
A three-roller mill works by passing the grain through two gaps. The first breaks the grain’s husk and the second grinds the grits. Three-roller mills protect the integrity of the husk which helps with the lautering process.
A two-roller mill has just one gap. You need to adjust the gap to find the right crush balance between husks, grits, and flour. For most homebrewers, two-roller mills are great tools for the job. They don’t crush grain as fast as three-roller mills, but for a 5 or 10-gallon batch, it’s only a few minutes different.
Material
The mill’s rollers are what crush the grain. These are usually made with hardened steel but stainless steel rollers also exist. For most applications, hardened steel is the best option due to its durability. Stainless steel is more expensive but has better protection against corrosion. If you live in a damp or coastal region, stainless might be a good option.
What to avoid
Many homebrewers’ first mill is a Victoria Grain Mill (formerly called a Corona mill). This type of mill works by grinding the malt between two plates. It is very difficult to get a consistent crush and time consuming to mill large quantities. We strongly recommend going with a roller mill.
Fundamentals Of Malt Video Course
If you want to learn everything you need to know about malt, check out this Craft Beer & Brewing video course:
Malt is to beer as grapes are to wine, as honey is to mead, and as apples are to cider. Without malt, beer as we know it would not be. In this course, you'll gain a deeper understanding of what's often called the soul of beer--malt.
It’s free for the first 30 days giving you access to over 60 homebrewing courses from the best brewers in the business.
Final Thoughts
Crushing your own malt for your homebrew gives you more control over your recipes and saves you money. We highly recommend that all grain brewers invest in a grain mill as it’s one of a homebrewer’s most useful tools.
Crushing malt at home requires a good quality mill and a way to power it. An electric drill will make your milling a lot faster, but you can always use a bit of elbow grease and crank it by hand. Either way, you’ll love the added control and consistency that milling your own malt will bring to your homebrewing.
Frequently Asked Questions
Can I crush malt for homebrew without a grain mill?
If you’re in a pinch, you can crush malt with a rolling pin. We don’t recommend this method for large batches of beer, but for ½ pound of grain, like for an extract batch, it can do the job.
Put your uncrushed grain in a ziplock freezer bag. On a flat surface, roll the rolling pin back and forth, applying medium pressure. The grains husks should start to crack and the kernel become pulverized.
Can you overcrush malt for homebrewing?
Yes – too fine of a crush can lead to stuck sparges. On top of that, a very fine crush will contribute to haze in the finished beer.
How long does crushed grain last?
For best results, you should crush your grain right before you brew. Freshly crushed grain produces better tasting beer and limits the chance of stale or oxidized flavors.
If necessary, crushed grain can be stored for 2 to 3 months in a sealed, air-tight container or bag.