Near the end of the brew day, one of the last big pieces of equipment to clean is the brew kettle. Stuck on hops, slimy proteins, and sticky wort can create a messy situation. We’ll tell you what you need to know to make your life easy after a successful brew so you can sit back and enjoy a homebrew as quickly as possible.
How do you clean a brew kettle?
Clean your brew kettle immediately after you brew. Use a PBW or Oxiclean solution at 130°F. Fill up the kettle, and let it soak for about 20 minutes. If you have a recirculating pump, run that to create your very own clean-in-place (CIP) system. Scrub down the kettle with a soft sponge to remove all hop debris, trub, and stuck-on wort. Dump the cleaning product and rinse the kettle with 130°F water. Dry well with a lint free cloth and store away for your next use!

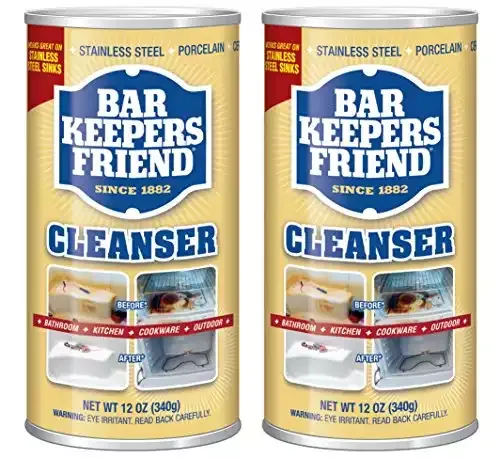
For a deep clean every 6 to 12 months, make sure to remove all of the kettle’s accessories. This includes the ball valve, bazooka screen, sight glass, and heating element. Thoroughly clean everything with PBW or Oxiclean. To prolong the life of your equipment, every year you should passivate stainless steel kettles with a simple paste of Bar Keepers Friend.
Must Have Products
Cleaning brewing equipment isn’t quite the same as cleaning your kitchenware and cooking appliances. We probably don’t have to tell you that beer is a special creature.
Never use common dish soaps or detergents to clean brewing equipment. Leftover oils and soap residue in the kettle can cause poor head retention in the finished beer. Scented cleaning products are also a no-go since fragrances can carry over to your wort.
Here is what you need to have:
- Oxygen based homebrew cleaner: PBW or Oxiclean Free
- Soft sponge: Never use a metal sponge, steel wool, or scrubber pad on a brew kettle
- Bar Keepers Friend
- Rubber or latex gloves
- Lint free towel for drying
- Small pipe cleaner for ball valves and sight glasses
Cleaning After Every Brew
After transferring your wort to the fermenter, you should be left with a bit of hop matter, break material, and some sticky wort. Dump all that out and give the brew kettle a rinse with fresh water. Blasting it with some pressure here is a great idea – either with a garden hose or a sink hose adapter.
In the kettle, mix about 1 ounce of PBW or Oxiclean per gallon of hot, 130°F water. For a 6 gallon brew kettle, make about 4 or 5 gallons worth of cleaning solution.
With a soft sponge, scrub the upper walls of the kettle. You should see a distinct line where the surface of the boil reached during the brew. You might have to pay special attention to that as it tends to be an area where wort sticks, causing discoloration.
After cleaning your kettle with the hot cleaning product, dump out the solution. Rinse the kettle with 130°F water. Inspect the kettle to make sure every bit of gunk has been removed and the kettle looks nice and shiny.
Dry thoroughly with a lint free towel before putting the kettle away for storage.
Common Accessories
If you have a recirculation pump, go ahead and connect that to your brew kettle. Turn on the pump and let the hot cleaning solution circulate for 15 to 20 minutes. If you use a plate or counterflow chiller, you’ll want to connect that as well for a thorough internal cleaning.
Electric brew kettles with an immersion heater need some special attention. Scrub the element with a sponge to clean off any stuck-on residue. The element should feel smooth to the touch after cleaning, with no gritty or sticky film.
For ball valves, open and close the valve a few times, ensuring all internals of the valve have been rinsed with cleaning product. Pass a pipe cleaner or tube brush through the valve. If your kettle has a hop dam, bazooka screen, or temperature probe, be careful to clean the nooks and crannies with the sponge.
Clean Underneath
If you brew on propane, soot will tend to build up on the bottom of the kettle during the brew. Usually PBW or Oxiclean is enough to get this clean. If you want it sparkling after every batch, use Bar Keepers Friend.
Apply a thin layer of Bar Keepers Friend, scrubbing with a soft brush until all of the discoloration is gone. Spray down with water and dry thoroughly before storing.
Cleaning After Every 6 to 12 Brews
Thoroughly disassembling and cleaning your brew kettle every 6 months to a year is a must-do for all homebrewers. This preventative maintenance helps prolong its life and reduces the risk of contaminating your brews.
Most kettles have a few accessories. Ball valves, a sightglass, or a heating element – these should all be disassembled and cleaned. Pay special attention to clean around the penetrations on the kettle’s wall too. There might be built up residue that you’ll want to get rid of.
Disassemble Ball Valve and Sight Glass
Some brewers struggle with contaminated batches due to bacteria build-up inside of their kettle’s valve. Most kettles have either a 2-piece or 3-piece ball valve.
Remove the valve from the kettle. A 3-piece valve requires some extra attention to detail, but you should be able to completely disassemble it for cleaning. Wipe down the outside and inside all of the valves components with a sponge soaked in cleaning solution. Use a pipe brush to clean all of the internal components thoroughly.
If your kettle has a sightglass, this should also be disassembled and cleaned. Use the pipe brush to clean inside the sight glass and elbow joints.
Bazooka Screen, Trub Dam, and Heating Element
Your kettle’s internal components should also be cleaned thoroughly.
You can soak a bazooka screen in a cleaning solution for a few hours and rise it off with boiling water. Use a brush to ensure there is no debris stuck in the bazooka’s mesh. A trub dam can be cleaned in the same way.
If you have an internal heating element, go ahead and take that off and clean it with a sponge and even a toothbrush to reach all the bends and corners.
After cleaning, make sure you thoroughly dry each component with a lint free towel. Allow everything to air dry completely for a few hours before reassembling for storage.
Passivating Your Stainless Brew Kettle
Passivating stainless steel creates a thin oxide layer protecting against rust. Regular use and cleaning can damage this layer of chromium, leading to rusting. Passivation can restore the protection.
Passivating your brew kettle should be done every year or so. Many acid products will work – even citric acid – but we prefer a product called Bar Keepers Friend. It’s readily available, affordable, and easy to use.
Bar Keepers Friend comes in a paste or powder format. If it’s the powder, mix it with water as per the instructions on the package to make a paste. Use a soft sponge to spread the paste evenly over all of the stainless surfaces. You’ll want to wear gloves when handling Bar Keepers Friend.
Note: Don’t use Bar Keepers Friend on laser etched volume markings – it will remove it from the stainless.
Leave the Bar Keepers Friend layer on the kettle for about 20 minutes before rinsing thoroughly with water,
Dry completely with a lint free cloth. The chromium layer will form as the stainless is exposed to oxygen, ensuring your kettle is protected against rust for months.
Brew Kettle Cleaning Tips
Tip #1 – Don’t wait!
Clean your brew kettle immediately after you fill your fermenter. The longer you wait to clean, the harder it’s going to be. Wort and other debris will start to dry, stick to the kettle, and make cleaning it off a pain.
Tip #2 – Use hot water
Using hot water to clean your brew kettle will make the gunk wash away with ease. If your kettle isn’t close to a hot water source, consider warming up a water and cleaner solution inside the kettle to about 130°F.
Both PBW and Oxiclean work better at hotter temperatures. Be sure to also rinse with hot water for best results.
Tip #3 – Recirculate
If you have a valve on your kettle and a brew pump, recirculate your cleaning product through your kettle for 15 to 20 minutes. You can start the pump and let your kettle essentially clean itself while you take care of the rest of the tidying up.
After 20 minutes, dump out the cleaning product and recirculate some fresh water for 5 minutes. Your kettle should be as clean as a whistle. For an even better experience, get yourself a spray ball to create your very own CIP system.
Final Thoughts
Cleaning your brew kettle doesn’t require much effort as long as you take care of it quickly and have the right cleaning products. The kettle is the central piece of a home brewery and it should be properly cared for and routinely maintained.
Keeping your kettle clean will prolong its life and eliminate the potential for bacteria to grow. A well-kept brew kettle will last you years and years. And even when you upgrade your system, you’ll always find a use for a spare kettle, like decoction mashing. It’s definitely worth the minimal effort to keep your brew kettle clean and in tip-top shape.


