Looking for a rich malt flavor, beautiful head retention, and sparkling clarity in your homebrew? Decoction mashing – that often misunderstood traditional technique – might be worth trying.
Decoction mashing is a traditional mashing technique for brewing beer. Removing some of the mash, boiling it, and mixing it back in the mash tun raises the temperature of the mash. This creates specific malt characteristics and flavors at different rest temperatures. Boiling also caramelizes the malt, adding color and rich malt flavor to the beer. Decoction mashing is labor intensive and many homebrewers find it unnecessary. However, the flavor addition is undeniable and worth the effort for many beer styles.
What is decoction mashing?
A decoction mash is a step mash where a portion of grain is removed, boiled, and added back to the mash tun to increase the rest temperature to the next step. The most traditional is a triple decoction mash, where a decoction is boiled three times to achieve four different mash steps. Single and double decoctions are also quite common.
Decoction mashing increases melanoidins in the mash, contributing to a fuller, maltier character in the beer. Increased tannins from boiling the grain also add to the mouthfeel of a beer.
Decoction mashes are traditional and quite uncommon in modern breweries. Still, decoction brewers believe it is worth the extra effort. Some of the finest beers in the world, like Pilsner Urquell, are brewed using a decoction mash.
Benefits
- Imparts a richer malt flavor and deeper color
- Enhanced beer clarity
- Higher extraction of sugars from the malt
- Fuller mouthfeel
Drawbacks
- Time consuming. Expect to add about 2 to 3 hours to your brewday.
- Modern malt is highly modified. This means that a single infusion rest is usually enough to convert the sugars. A longer mash (i.e. decoction) can actually be detrimental when using highly modified malt. Hot side aeration can cause oxidation. Proteins in highly modified malt can also be degraded if mashed too long, leading to poor head retention.
What styles traditionally benefit from decoction mashing?
Decoction mashing is widely practiced by European lager brewers. Almost all European-style lager beer can benefit from decoction mashing.
To accentuate malitness, subtle grain flavor, and breadiness, a decoction can really help. Pilsners, helles, bocks, and dunkels are all great candidates. Even some ale styles benefit from decoction. The malt profiles of Hefeweizen and Kolsch are certainly enhanced with even a single decoction mash.
What equipment do I need to perform a decoction?
First of all, decoction is an all grain brewing technique. If you’re an extract or partial mash brewer, you’ll first need to invest in an all grain setup. Decoction mashing is possible on a traditional 3-vessel system, a brew in a bag set-up, and even an all-in-one system like a Grainfather.
On top of your standard homebrewing system, the following equipment is required to decoction mash:
Decoction Kettle and Heat Source
You’ll need a kettle to boil the decoction. Some homebrewers choose to use their boil kettle. The downside to that is having to thoroughly clean out the grain before sparging. We recommend a separate kettle for the decoction. The kettle can either be stainless steel or aluminum. You don’t need a ball valve or false bottom. The volume should be about one third to one half the size of your mash tun.
To heat the decoction, you need a heat source – normally propane, electric, or induction. Many homebrewers also perform the decoction boil on their stove top.
Decoction Tools
The following tools are used to transfer the grains from the mash tun to the decoction kettle:
- Large scoop or sieve
- 2 quart heat resistant jug
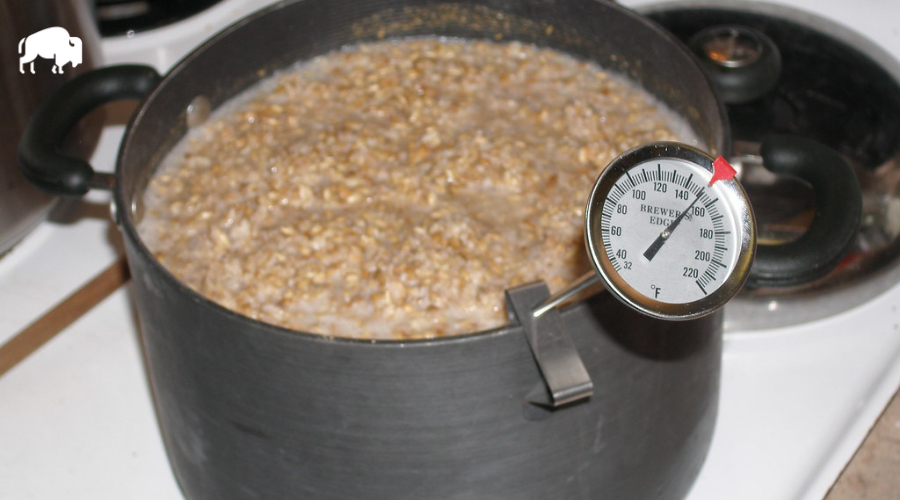
Thermometer
If you don’t already have one, you’ll need a thermometer to check the temperature of the mash and the decoction.
How do I calculate the decoction volume?
The volume to decoct for each mash step depends on the volume of the mash, thickness of the mash (grain to water ratio), and the rest temperature. Traditionally, in 3-vessel all grain systems, a decoction would be about one third of the thick mash – meaning mostly grain with minimal water.
These days, homebrewers have a huge range of equipment profiles including brew in a bag and all-in-one systems. For this reason, a general rule of thumb for decoction volumes becomes difficult. It’s best to calculate each step using the following formula:
| Decoction Volume = | Total Mash Volume x (Target Temperature – Start Temperature) Mash Boil Temperature – Start Temperature |
Alternatively, BeerSmith 3 has a built in decoction calculator that you can customize to match your equipment profile.
For each decoction volume calculation, add about 15-20% safety. It’s a good idea to have extra volume in the decoction kettle to ensure you hit your temperature rest. Any extra decoction gets added back into the mash once it cools down to the mash rest temperature.
How to Do A Single Decoction
A great entry into the world of decoction mashing is a single decoction. Normally used to heat up the mash from saccharification rest to a mash-out, a single decoction can add a layer of malty complexity to your brew. It’s a great technique to use to add some body to a Hefeweizen or give a Pilsner a touch more color and malt sweetness.
Step 1: Mash in
Start your brew day like any other. Heat up your strike water for the first step, the saccharification rest. This step is usually between 145°F to 155°F, depending on the beer style.
Step 2: Perform the saccharification rest
Allow the mash to rest for 30 to 45 minutes.
Step 3: Pull the decoction
Calculate your decoction volume to raise the mash temperature to 170°F.
Pull off the thickest part of the mash, meaning mostly grain with minimal liquid. The decoction should be quite thick but you should still be able to easily stir it in the decoction kettle.
Slowly bring the decoction to a boil. Make sure to stir regularly to avoid scorching.
Step 4: Boil the decoction
Allow the decoction to boil for at least 5 minutes. Boil longer for darker beers to impart more color and caramel flavor, up to 30 minutes.
Step 5: Add back the decoction to the mash
Turn off the heat on the decoction kettle.
To bring the mash up to mash-out temperature, begin transferring the decoction back to the mash tun. Use a large scoop or quart jug to transfer the boiling decoction, one or two quarts at a time. Be very careful as the mixture is still near boiling temperatures.
Stir the mash regularly and monitor the temperature. Once a mash-out temperature of 170°F is reached, hold it at that temperature for 10 minutes. Allow any leftover decoction to chill to 170°F and add that back to the mash tun.
Step 6: Sparge and proceed to the boil to finish the brew as normal
Batch sparge, fly sparge, or no-sparge – whichever method you choose, and collect the full volume of wort in your boil kettle.
From here, it’s just like any other brew day. Finish the boil, chill the wort, and pitch the yeast.
How to Do A Double Decoction
For a double decoction, there will be a total of 3 mash rests: the protein rest, saccharification rest, and mash-out.
The addition of a protein rest helps break down proteins, resulting in a clearer beer. If using highly modified malt, be sure to keep the protein rest short to avoid too much protein degradation.
Step 1: Mash in
Start your brew day like any other. Heat up your strike water for the first rest, the protein rest. This step is around 122°F.
Step 2: Perform the protein rest
Allow the mash to rest at 122°F for 10 to 15 minutes.
Step 3: Pull the first decoction
Calculate your decoction volume to raise the mash temperature to 145°F – 155°F for the saccharification rest. Like the single decoction, you only want to pull off the thickest part of the mash.
Slowly heat the decoction over medium heat. Make sure to stir regularly to avoid scorching.
Allow the decoction to rest for 20 minutes at 150°F to allow for starch conversion of the decocted portion – this helps boost efficiency.
Continue heating to bring the decoction to a boil. Again, be very careful not to scorch the mixture.
Step 4: Boil the decoction
Allow the decoction to boil for at least 5 minutes. Boil longer for darker beers to impart more color and caramel flavor, up to 30 minutes.
Step 5: Add back the decoction to the mash
Turn off the heat on the decoction kettle.
To bring the mash up to saccharification temperature, begin transferring the decoction back to the mash tun. Use a large scoop or quart jug to transfer the boiling decoction, one or two quarts at a time. Be very careful as the mixture is still near boiling temperatures.
Stir the mash regularly and monitor the temperature. Once saccharification is reached, hold it at that temperature for 45 minutes. Allow any leftover decoction to chill to 150°F and add that back to the mash tun.
Step 6: Pull the second decoction, boil, and perform the mash-out rest
Calculate your decoction volume to raise the mash temperature to 170°F for the mash-out.
Continue as the previous decoction – omitting the conversion rest step – and complete the mash-out rest.
Step 7: Sparge and proceed to the boil to finish the brew as normal
Batch sparge, fly sparge, or no-sparge – whichever method you choose, and collect the full volume of wort in your boil kettle.
From here, it’s just like any other brew day. Finish the boil, chill the wort, and pitch the yeast.
How to Do A Triple Decoction
The holy grail of decoction mashing – a triple decoction. Consider using this method if brewing with undermodified malt, such as home-malted grain. It’s also useful if you have a large portion of unmalted grain.
For a triple decoction, there will be a total of 4 mash rests: the acid rest, protein rest, saccharification rest, and mash-out. The addition of the acid rest step will lower the pH of the mash and help prevent a gummy mash.
Step 1: Mash in
Start your brew day like any other. Heat up your strike water for the first rest, the acid rest. This step is about 97°F.
Step 2: Perform the acid rest
Allow the mash to rest at 97°F for 20 minutes.
Step 3: Pull the first decoction
Calculate your decoction volume to raise the mash temperature to 122°F for the protein rest.
Pull the decoction and slowly heat over medium heat. Make sure to stir regularly to avoid scorching.
Step 4: Boil the decoction
Allow the decoction to boil for at least 5 minutes. Boil longer for darker beers to impart more color and caramel flavor, up to 30 minutes.
Step 5: Add back the decoction to the mash for the protein rest
Turn off the heat on the decoction kettle.
To bring the mash up to the protein rest temperature, begin transferring the decoction back to the mash tun. Use a large scoop or quart jug to transfer the boiling decoction, one or two quarts at a time. Be very careful as the mixture is still near boiling temperatures.
Stir the mash regularly and monitor the temperature. Once the rest temperature is reached, hold it for 20 minutes. Allow any leftover decoction to chill to 122°F and add that back to the mash tun.
Step 6: Pull the second decoction, boil, and perform saccharification rest
Calculate your decoction volume to raise the mash temperature to 145-155°F for the saccharification rest.
Continue as the previous decoction and complete the temperature rest.
Step 7: Pull the third decoction, boil, and perform mash-out
Calculate your decoction volume to raise the mash temperature to 170°F for the mash-out.
Continue as the previous decoction and complete the mash-out rest.
Step 8: Sparge and proceed to the boil to finish the brew as normal
Batch sparge, fly sparge, or no-sparge – whichever method you choose, and collect the full volume of wort in your boil kettle.
From here, it’s just like any other brew day. Finish the boil, chill the wort, and pitch the yeast.
Final Thoughts
Decoction mashing is a great way to impart added complexity and maltiness to your homebrew. It’s definitely a worthwhile experiment despite the added time and effort. We highly recommend trying out a single or double decoction to see the results for yourself.
Homebrewing is a hobby centered around experimentation, creativity, and science. Most of all, it’s about having fun and enjoying the results of hard work put into the craft. Decoction mashing makes your brew day longer – but who can complain about a little extra time spent doing something you love?
Frequently Asked Questions
Is a decoction mash necessary for traditional styles?
Brewing traditional styles with traditional methods is a fun way to recreate historic beers. If you want to recreate classic European lagers, use European base grain and perform a decoction mash. This will get you the most accurate representation.
That being said, the differences between a decoction mash and a typical single infusion mash may be subtle. It depends on the ingredients, equipment, and procedure.
We recommend trying out a decoction mash and comparing it to a typical single infusion mash to see the differences yourself.
Do I need to do a decoction mash with highly modified malt?
Modern, highly modified malt, like commercial American 2-row, can be fully converted with a single infusion mash. Decoction mashes are not necessary for conversion and aren’t always beneficial, depending on the beer.
For classic styles, a single decoction works well to add complexity without hurting mash quality when using modified malt.